Friday, October 23, 2020

Hot to set Gruvbox to Vim with dark theme

 Setting up VIM with gruvbox dark theme
- install git on your terminal
- create a hidden VIM directory

mkdir ~/.vim

- clone the repo to the VIM folder

git clone https://github.com/morhetz/gruvbox.git ~/.vim

- test colorschme + spacebar + tab to check if gruvbox theme is available in VIM's colorscheme.
- to permanently set this colorscheme when you launch the application, enter the following

echo 'colorscheme gruvbox' >> ~/.vimrc

- to permanently set the dark background, enter the following

echo 'set bg=dark' >> ~/.vimrc

- to permanently set the number line, enter the following

        echo 'set number' >> ~/.vimrc

Additional note to add additional colorscheme to Vim.
First is to clone the source from github to local folder such as ~/.vim_newcolorscheme_folder
Copy over the .vim file from this folder to ~/.vim/colors to make it available.


Sources
:
How to change colors and themes in VIM
https://opensource.com/article/19/12/colors-themes-vim


How to enable dark mode in gruvbox
https://github.com/morhetz/gruvbox/issues/224

Git link for gruvbox
https://github.com/morhetz/gruvbox

Sunday, October 18, 2020

Use NMAP to test SSH connection

 Notes:

Objective: Use nmap tool to scan-thru servers listed in IP_ADDRESS.txt and return the status of sshd.

Workstation IP: 192.168.9.27/24
Remote Server_1 IP: 192.168.9.29/24 and 192.168.56.105/24
Remote Server_2 IP: 192.168.56.102/24

2 files created:
/documents/nmap_test/IP_ADDRESS.txt
/documents/nmap_test/TEST_SSH.sh

Image on the left shows IP addresses in the network and entered them in IP_ADDRESS.txt.

Next step is to install nmap tool in  Server_1.


On Server_1, run nmap tool to check sshd status on Server_2.


Create TEST_SSH.sh and add execute permission to this file.


Run TEST_SSH.sh << Still need to debug this script

Tuesday, October 13, 2020

 Reinstalling GRUB using a Rescue Disk.

Initial step is to boot to Rescue mode and mount the installed OS to /mnt/sysimage directory as describe in Troubleshooting with Rescue Option.

After you have restored access to your server using a rescue disk, rsinstalling GRUB 2 is just 2 steps process:

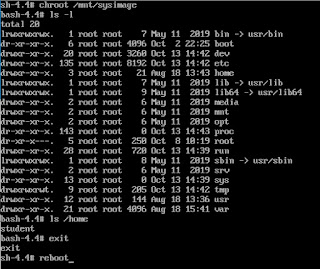
Make sure to make the contents of the /mnt/sysimage directory available to the current environment, using the # chroot /mnt/sysimage command. 


Use the # grub2-install command, followed by the name of the device on which you want reinstall GRUB 2.
For KVM virtual machine, the command is # grub2-install /dev/vda
For physical server/VMware/Virtual Box virtual machine, the command is # grub2-install /dev/sda


Type exit and reboot after successfully reinstalling Grub2.

If your system is in a non-bootable state.  You need to first boot the system to Rescue mode and restore access to your system from the Rescue system.  Next is to mount your server's file system on /mnt/sysimage and using # chroot /mnt/sysimage to make the mounted system image your root image.
From here, just run # grub2-install to install GRUB 2 to the desired installation device. 
For KVM virtual machine, the command is # grub2-install /dev/vda
For physical server/VMware/Virtual Box virtual machine, the command is # grub2-install /dev/sda


RHEL 8 - Troubleshooting with Rescue Option

 Using the Rescue Option in RHEL 8.

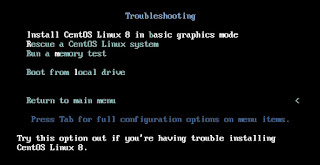
First restart your server from the installation disk and select the Troubleshooting menu option.


From the Troubleshooting menu, select Rescue Red Hat Enterprise Linux System.  This option doesn't not overwrite your current configuration but only to load a rescue system.


The rescue system prompts user that it will try to find an installed Linux system and mount it on /mnt/sysimage.  Press 1 to accept the Continue option.


Once a valid RH OS installation was found and user is prompted that the system has been mounted under /mnt/sysimage.  At this point, user can press Enter twice to access the rescue shell.


At this point, your Linux installation is accessible through the /mnt/sysimage directory.  User can type chroot /mnt/sysimage.  At this point user  have access to the system root file system and you can access all tools that is needed to repair access of the system.

Once repair is completed, user can type exit and reboot to restart the system in a normal mode.