Access-Control Lists (ACLs)
Access-Control Lists consist of one or multiple Access-Control Entries/Rules.
Each entries or rule has Permit/Deny condition.
Utilize Access-Control Lists for:
- to Identify Traffic
Identify INTERESTING TRAFFIC, for example VPN or ISDN traffic
Identify ROUTES to FILTER/ALLOW in ROUTING UPDATES
Identify TRAFFIC for QoS purpose
- to Filter Traffic
To Filter Traffic
- PERMIT is used to ALLOW TRAFFIC
- DENY is used to BLOCK TRAFFIC
To Identify Traffic
- PERMIT is used to INCLUDE TRAFFIC
- DENY is used to NOT INCLUDE TRAFFIC
NOTES:
ACL: Identify Traffic and Filter Traffic
IP Prefix-List: Match Routes (Not Traffic)
Route-Map: Advanced version of ACL. Use for Permit/Deny Traffic, Perform Action and Modify Traffic
Distribute List: Filter Routing Updates.
Distribute-List uses Access-List or Prefix-List
Saturday, October 27, 2012
Friday, September 7, 2012
Configure Physical Voice Port
Configure Analog Voice Port
To configure CME voice port on router, first find out what voice ports is equipped on the router by running the following command:
Router# show voice port summary
FXS: Foreign eXchange Station
FXO: Foreign eXchange Office
For analog FXS port configuration, there are several configuration options:
- signaling:
Ground start: must be configured and typically used when connecting to PBX equipment.
Loop start: is mon by default and typically is used when connecting to telephone, modem or fax.
- Call progress tones: audio signaling that inform the caller how the call is progressing.
- Caller ID information.
Note: each ephone-dn configured using CME will show up as EXFS port.
Configuration example for fax line connected to FXS port
# show voice port summary
Find available FXS port for the fax line.
# config t
voice-port 0/0/0
signal loop start
cptone sg
station-id name 3rd floor fax
station-id number 555-1001
Monday, May 14, 2012
GNS3 - Switch Configuration
This post is about how to work with switching in GNS3.
Configuration on how to create VLAN:
SW4#vlan database
SW4(vlan)#vlan 10 name Data_VLAN
VLAN 10 added:
Name: Data_VLAN
SW4(vlan)#vlan 20 name Voice_VLAN
VLAN 20 added:
Name: Voice_VLAN
SW4(vlan)#vlan 100 name MGMT_VLAN
VLAN 100 added:
Name: MGMT_VLAN
SW4(vlan)#apply
APPLY completed.
SW4(vlan)#exit
To join interfaces to VLAN
SW4(config)#int range fa 0/3 - 5
SW4(config-if-range)#switchport access vlan 10
SW4(config-if-range)#switchport voice vlan 20
SW4(config-if-range)#spanning-tree portfast
SW4(config-if-range)#exit
To show the VLAN status
SW4#show vlan-switch brief
VLAN Name Status Ports
---- -------------------------------- --------- -------------------------------
1 default active Fa0/6, Fa0/7, Fa0/8, Fa0/9
Fa0/10, Fa0/11, Fa0/12, Fa0/13
Fa0/14
10 Data_VLAN active Fa0/1, Fa0/2, Fa0/3, Fa0/4
Fa0/5
20 Voice_VLAN active
100 MGMT_VLAN active Fa0/15
1002 fddi-default active
1003 token-ring-default active
1004 fddinet-default active
1005 trnet-default active
SW4#
To save vlan configuration to vlan.dat and to make sure router retains vlan database after restarting GNS3
SW4#dir nvram:
Directory of nvram:/
123 -rw- 1536 <no date> startup-config
124 ---- 0 <no date> private-config
129016 bytes total (127428 bytes free)
SW4#config t
Enter configuration commands, one per line. End with CNTL/Z.
SW4(config)#vtp file nvram:vlan.dat
Setting device to store VLAN database at filename nvram:vlan.dat.
SW4(config)#do dir nvram:
Directory of nvram:/
123 -rw- 1536 <no date> startup-config
124 ---- 0 <no date> private-config
1 -rw- 780 <no date> vlan.dat
129016 bytes total (126404 bytes free)
SW4(config)#do wr mem
Building configuration...
[OK]
SW4(config)#
Sunday, April 22, 2012
Upgrading Cisco Switch 3750G with Overwrite Command
This post is to show step-by-step IOS upgrade for 3750G Switch.
Device and software used for this update:
- Cisco Switch 3750G-24T
- Cisco Switch IOS 12.2.55-SE5
- TFTP server software
Scenario:
- Cisco Switch 3540G flash has 5.7MB free space
- Cisco Switch IOS 12.2.55-ES5 upgrade needs 11.54MB
- Not enough free space on flash storage
First,find out the flash free space and what version of IOS is running on the switch.
Switch# dir flash:
Directory of flash:/
2 -rwx 3001 Jul 25 1993 05:53:33 +00:00 private-config.text
4 -rwx 1644 Jun 28 1993 14:11:01 +00:00 vlan.dat
459 drwx 192 Jun 16 1993 06:51:50 +00:00 c3750-ipbasek9-mz.122-35.SE2 458 -rwx 10170 Jul 25 1993 05:53:33 +00:00 config.text
15998976 bytes total (5790208 bytes free)
Switch#
As we can see here, the flash has 5.7MB of free space. The new IOS image requires 11.54MB as stated on Cisco Website.
Next step is to download the Image tar file from Cisco website.

Saved the file to TFTP server folder and ready to upload it to Cisco Switch.
Since there is not enough free space in Flash storage, we have to overwrite the old IOS file with the new one.
First send an icmp ping command to the TFTP server to make sure it is reachable from the Switch.
Switch#ping 10.1.1.173
Type escape sequence to abort.
Sending 5, 100-byte ICMP Echos to 10.1.1.173, timeout is 2 seconds:
!!!!!
Success rate is 100 percent (5/5), round-trip min/avg/max = 1/2/8 ms
Switch#
Next step is to upload and overwrite the current IOS with the new IOS (tar file).
Switch#archive download-sw /overwrite tftp://10.1.1.173/c3750-ipbaselmk9-tar.122-55.SE5.tar
Loading c3750-ipbaselmk9-tar.122-55.SE5.tar from 10.1.1.173 (via Vlan20): !!!!!!!!!!!!!!!!!!!!!!!!!!!!!!!!!!!!!!!!!!!!!!!!!!!!!!!!!!!!!!!!!!!!!!!!!!!!!!!!!!!!!!!!!!!!!!!!!!!!!!!!!!!!!!!!!!!!!!!!!!!!!!!!!!!!!!!!!!!!!!!!!!!!!!!!!!!!!!!!!!!!!!!!!!!!!!!!!!!!!!!!!!!!!!!!!!!!!!!!!!!!!!!!!!!!!!!!!!!!!!!!!!!!!!!!!!!!!!!!!!!!!!!!!!!!!!!!!!!!!!!!!!!!!!!!!!!!!!!!!!!!!!!!!!!!!!!!!!!!!!!!!!!!!!!!!!!!!!!!!!!!!!!!!!!!!!!!!!!!!!!!!!!!!!!!!!!!!!!!!!!!!!!!!!!!!!!!!!!!!!!!!!!!!!!!!!!!!!!!!!!!!!!!!!!!!!!!!!!!!!!!!!!!!!!!!!!!!!!!!!!!!!!!!!!!!!!!!!!!!!!!!!!!!!!!!!!!!!!!!!!!!!!!!!!!!!!!!!!!!!!!!!!!!!!!!!!!!!!!!!!!!!!!!!!!!!!!!!!!!!!!!!!!!!!!!!!!!!!!!!!!!!!!!!!!!!!!!!!!!!!!!!!!!!!!!!!!!!!!!!!!!!!!!!!!!!!!!!!!!!!!!!!!!!!!!!!!!!!!!!!!!!!!!!!!!!!!!!!!!!!!!!!!!!!!!!!!!!!!!!!!!!!!!!!!!!!!!!!!!!!!!!!!!!!!!!!!!!!!!!!!!!!!!!!!!!!!!!!!!!!!!!!!!!!!!!!!!!!!!!!!!!!!!!!!!!!!!!!!!!!!!!!!!!!!!!!!!!!!!!!!!!!!!!!!!!!!!!!!!!!!!!!!!!!!!!!!!!!!!!!!!!!!!!!!!!!!!!!!!!!!!!!!!!!!!!!!!!!!!!!!!!!!!!!!!!!!!!!!!!!!!!!!!!!!!!!!!!!!!!!!!!!!!!!!!!!!!!!!!!!!!!!!!!!!!!!!!!!!!!!!!!!!!!!!!!!!!!!!!!!!!!!!!!!!!!!!!!!!!!!!!!!!!!!!!!!!!!!!!!!!!!!!!!!!!!!!!!!!!!!!!!!!!!!!!!!!!!!!!!!!!!!!!!!!!!!!!!!!!!!!!!!!!!!!!!!!!!!!!!!!!!!!!!!!!!!!!!!!!!!!!!!!!!!!!!!!!!!!!!!!!!!!!!!!!!!!!!!!!!!!!!!!!!!!!!!!!!!!!!!!!!!!!!!!!!!!!!!!!!!!!!!!!!!!!
!!!!!!!!!!!!!!!!!!!!!!!!!!!!!!!!!!!!!!!!!!!!!!!!!!!!!!!!!!!!!!!!!!!!!!!!!!!!!!!!!!!!!!!!!!!!!!!!!!!!!!!!!!!!!!!!!!!!!!!!!!!!!!!!!!!!!!!!!!!!!!!!!!!!!!!!!!!!!!!!!!!!!!!!!!!!!!!!!!!!!!!!!!!!!!!!!!!!!!!!!!!!!!!!!!!!!!!!!!!!!!!!!!!!!!!!!!!!!!!!!!!!!!!!!!!!!!!!!!!!!!!!!!!!!!!!!!!!!!!!!!!!!!!!!!!!!!!!!!!!!!!!!!!!!!!!!!!!!!!!!!!!!!!!!!!!!!!!!!!!!!!!!!!!!!!!!!!!!!!!!!!!!!!!!!!!!!!!!!!!!!!!!!!!!!!!!!!!!!!!!!!!!!!!!!!!!!!!!!!!!!!!!!!!!!!!!!!!!!!!!!!!!!!!!!!!!!!!!!!!!!!!!!!!!!!!!!!!!!!!!!!!!!!!!!!!!!!!!!!!!!!!!!!!!!!!!!!!!!!!!!!!!!!!!!!!!!!!!!!!!!!!!!!!!!!!!!!!!!!!!!!!!!!!!!!!!!!!!!!!!!!!!!!!!!!!!!!!!!!!!!!!!!!!!!!!!!!!!!!!!!!!!!!!!!!!!!!!!!!!!!!!!!!!!!!!!!!!!!!!!!!!!!!!!!!!!!!!!!!!!!!!!!!!!!!!!!!!!!!!!!!!!!!!!!!!!!!!!!!!!!!!!!!!!!!!!!!!!!!!!!!!!!!!!!!!!!!!!!!!!!!!!!!!!!!!!!!!!!!!!!!!!!!!!!!!!!!!!!!!!!!!!!!!!!!!!!!!!!!!!!!!!!!!!!!!!!!!!!!!!!!!!!!!!!!!!!!!!!!!!!!!!!!!!!!!!!!!!!!!!!!!!!!!!!!!!!!!!!!!!!!!!!!!!!!!!!!!!!!!!!!!!!!!!!!!!!!!!!!!!!!!!!!!!!!!!!!!!!!!!!!!!!!!!!!!!!!!!!!!!!!!!!!!!!!!!!!!!!!!!!!!!!!!!!!!!!!!!!!!!!!!!!!!!!!!!!!!!!!!!!!!!!!!!!!!!!!!!!!!!!!!!!!!!!!!!!!!!!!!!!!!!!!!!!!!!!!!!!!!!!!!!!!!!!!!!!!!!!!!!!!!!!!!!!!!!!!!!!!!!!!!!!!!!!!!!!!!!!!!!!!!!!!!!!!!!!!!!!!!!!!!!!!!!!!!!!!!!!!!!!!!!!!!!!!!!!!!!!!!!!!!!!!!!!!!!!!!!!!!!!!!!!!!!!!!!!!!!!!!!!!!!!!!
[OK - 12697600 bytes]
Loading c3750-ipbaselmk9-tar.122-55.SE5.tar from 10.1.1.173 (via Vlan20): !!!!!!!!!!!!!!!!!!!!!!!!!!!!!!!!!!!!!!!!!!!!!!!!!!!!!!!!!!!!!!!!!!!!!!!!!!!!!!!!!!!!!!!!!!!!!!!!!!!!!!!!!!!!!!!!!!!!!!!!!!!!!!!!!!!!!!!!!!!!!!!!!!!!!!!!!!!!!!!!!!!!!!!!!!!!!!!!!!!!!!!!!!!!!!!!!!!!!!!!!!!!!!!!!!!!!!!!!!!!!!!!!!!!!!!!!!!!!!!!!!!!!!!!!!!!!!!!!!!!!!!!!!!!!!!!!!!!!!!!!!!!!!!!!!!!!!!!!!!!!!!!!!!!!!!!!!!!!!!!!!!!!!!!!!!!!!!!!!!!!!!!!!!!!!!!!!!!!!!!!!!!!!!!!!!!!!!!!!!!!!!!!!!!!!!!!!!!!!!!!!!!!!!!!!!!!!!!!!!!!!!!!!!!!!!!!!!!!!!!!!!!!!!!!!!!!!!!!!!!!!!!!!!!!!!!!!!!!!!!!!!!!!!!!!!!!!!!!!!!!!!!!!!!!!!!!!!!!!!!!!!!!!!!!!!!!!!!!!!!!!!!!!!!!!!!!!!!!!!!!!!!!!!!!!!!!!!!!!!!!!!!!!!!!!!!!!!!!!!!!!!!!!!!!!!!!!!!!!!!!!!!!!!!!!!!!!!!!!!!!!!!!!!!!!!!!!!!!!!!!!!!!!!!!!!!!!!!!!!!!!!!!!!!!!!!!!!!!!!!!!!!!!!!!!!!!!!!!!!!!!!!!!!!!!!!!!!!!!!!!!!!!!!!!!!!!!!!!!!!!!!!!!!!!!!!!!!!!!!!!!!!!!!!!!!!!!!!!!!!!!!!!!!!!!!!!!!!!!!!!!!!!!!!!!!!!!!!!!!!!!!!!!!!!!!!!!!!!!!!!!!!!!!!!!!!!!!!!!!!!!!!!!!!!!!!!!!!!!!!!!!!!!!!!!!!!!!!!!!!!!!!!!!!!!!!!!!!!!!!!!!!!!!!!!!!!!!!!!!!!!!!!!!!!!!!!!!!!!!!!!!!!!!!!!!!!!!!!!!!!!!!!!!!!!!!!!!!!!!!!!!!!!!!!!!!!!!!!!!!!!!!!!!!!!!!!!!!!!!!!!!!!!!!!!!!!!!!!!!!!!!!!!!!!!!!!!!!!!!!!!!!!!!!!!!!!!!!!!!!!!!!!!!!!!!!!!!!!!!!!!!!!!!!!!!!!!!!!!!!!!!!!!!!!!!!!!!!!!!!!!!!!!!!!!!!!!!!!!!!!!!!!!!!!!!!!!!!!!!!!!!!!!!!!!!!!!!!!!!!!!!!!!!!!!!!!!!!!!!!!!!!!!!!!!!!!!!!!!!!!!!!!!!!!!!!!!!!!!!!!!!!!!!!!!!!!!!!!!!!!!!!!!!!!!!!!!!!!!!!!!!!!!!!!!!!!!!!!!!!!!!!!!!!!!!!!!!!!!!!!!!!!!!!!!!!!!!!!!!!!!!!!!!!!!!!!!!!!!!!!!!!!!!!!!!!!!!!!!!!!!!!!!!!!!!!!!!!!!!!!!!!!!!!!!!!!!!!!!!!!!!!!!!!!!!!!!!!!!!!!!!!!!!!!!!!!!!!!!!!!!!!!!!!!!!!!!!!!!!!!!!!!!!!!!!!!!!!!!!!!!!!!!!!!!!!!!!!!!!!!!!!!!!!!!!!!!!!!!!!!!!!!!!!!!!!!!!!!!!!!!!!!!!!!!!!!!!!!!!!!!!!!!!!!!!!!!!!!!!!!!!!!!!!!!!!!!!!!!!!!!!!!!!!!!!!!!!!!!!!!!!!!!!!!!!!!!!!!!!!!!!!!!!!!!!!!!!!!!!!!!!!!!!!!!!!!!!!!!!!!!!!!!!!!!!!!!!!!!!!!!!!!!!!!!!!!!!!!!!!!!!!!!!!!!!!!!!!!!!!!!!!!!!!!!!!!!!!!!!!!!!!!!!!!!!!!!!!!!!!!!!!!!!!!!!!!!!!!!!!!!!!!!!!!!!!!!!!!!!!!!!!!!!!!!!!!!!!!!!!!!!!!!!!!!!!!!!!!!!!!!!!!!!!!!!!!!!!!!!!!!!!!!!!!!!!!!!!!!!!!!!!!!!!!!!!!!!!!!!!!!!!!!!!!!!!!!!!!!!!!!!!!!!!!!!!!!!!!!!!!!!!!!!!!!!!!!!!!!!!!!!!!!!!!!!!!!!!!!!!!!!!!!!!!!!!!!!!!!!!!!!!!!!!!!!!!!!!!!!!!!!!!!!!!!!!!!!!!!!!!!!!!!!!!!!!!!!!!!!!!!!!!!!!!!!!!!!!!!!!!!!!!!!!!!!!!!!!!!!!!!!!!!!!!!!!!!!!!!!!!!!!!!!!!!!!!!!!!!!!!!!!!!!!!!!!!!!!!!!!!!!!!!!!!!!!!!!!!!!!!!!!!!!!!!!!!!!!!!!!!!!!!!!!!!!!!!!!!!!!!!!!!!!!!!!!!!!!!!!!!!!!!!!!!!!!!!!!!!!!!!!!!!!!!!!!!!!!!!!!!!!!!!!!!!!!!!!!!!!!!!!!!!!!!!!!!!!!!!!!!!!!!!!!!!!!!!!!!!!!!!!!!!!!!!!!!!!!!!!!!!!!!!!!!!!!!!!!!!!!
examining image...
extracting info (106 bytes)
extracting c3750-ipbasek9-mz.122-55.SE5/info (681 bytes)
extracting info (106 bytes)
Stacking Version Number: 1.45
System Type: 0x00000000
Ios Image File Size: 0x00B8B200
Total Image File Size: 0x00C19A00 Minimum Dram required: 0x08000000
Image Suffix: ipbasek9-122-55.SE5
Image Directory: c3750-ipbasek9-mz.122-55.SE5
Image Name: c3750-ipbasek9-mz.122-55.SE5.bin
Image Feature: IP|LAYER_3|SSH|3DES|MIN_DRAM_MEG=128
Old image for switch 1: flash:c3750-ipbasek9-mz.122-35.SE2
Old image will be deleted before download.
Deleting `flash:c3750-ipbasek9-mz.122-35.SE2' to create required space
Extracting images from archive into flash...
Once the overwrite is done, confirm that the Cisco Switch is booting from the new image.
Switch#dir flash:
Directory of flash:/
2 -rwx 3001 Jul 25 1993 05:53:33 +00:00 private-config.text
4 -rwx 1644 Jun 28 1993 14:11:01 +00:00 vlan.dat
510 drwx 192 Aug 8 1993 09:32:45 +00:00 c3750-ipbasek9-mz.122-55.SE5
458 -rwx 10170 Jul 25 1993 05:53:33 +00:00 config.text
15998976 bytes total (3331072 bytes free)
Switch#
The next step is to boot the image, save the configuration and reboot the system.
Switch#show boot
BOOT path-list : flash:c3750-ipbasek9-mz.122-55.SE5/c3750-ipbasek9-mz.122-55.SE5.bin
Config file : flash:/config.text
Private Config file : flash:/private-config.text
Enable Break : no
Manual Boot : no
HELPER path-list :
Auto upgrade : yes
Auto upgrade path :
Switch#
Switch#wr
Building configuration...
[OK]
Switch#reload
Proceed with reload? [confirm]
Device and software used for this update:
- Cisco Switch 3750G-24T
- Cisco Switch IOS 12.2.55-SE5
- TFTP server software
Scenario:
- Cisco Switch 3540G flash has 5.7MB free space
- Cisco Switch IOS 12.2.55-ES5 upgrade needs 11.54MB
- Not enough free space on flash storage
First,find out the flash free space and what version of IOS is running on the switch.
Switch# dir flash:
Directory of flash:/
2 -rwx 3001 Jul 25 1993 05:53:33 +00:00 private-config.text
4 -rwx 1644 Jun 28 1993 14:11:01 +00:00 vlan.dat
459 drwx 192 Jun 16 1993 06:51:50 +00:00 c3750-ipbasek9-mz.122-35.SE2 458 -rwx 10170 Jul 25 1993 05:53:33 +00:00 config.text
15998976 bytes total (5790208 bytes free)
Switch#
As we can see here, the flash has 5.7MB of free space. The new IOS image requires 11.54MB as stated on Cisco Website.

Saved the file to TFTP server folder and ready to upload it to Cisco Switch.
Since there is not enough free space in Flash storage, we have to overwrite the old IOS file with the new one.
First send an icmp ping command to the TFTP server to make sure it is reachable from the Switch.
Switch#ping 10.1.1.173
Type escape sequence to abort.
Sending 5, 100-byte ICMP Echos to 10.1.1.173, timeout is 2 seconds:
!!!!!
Success rate is 100 percent (5/5), round-trip min/avg/max = 1/2/8 ms
Switch#
Next step is to upload and overwrite the current IOS with the new IOS (tar file).
Switch#archive download-sw /overwrite tftp://10.1.1.173/c3750-ipbaselmk9-tar.122-55.SE5.tar
Loading c3750-ipbaselmk9-tar.122-55.SE5.tar from 10.1.1.173 (via Vlan20): !!!!!!!!!!!!!!!!!!!!!!!!!!!!!!!!!!!!!!!!!!!!!!!!!!!!!!!!!!!!!!!!!!!!!!!!!!!!!!!!!!!!!!!!!!!!!!!!!!!!!!!!!!!!!!!!!!!!!!!!!!!!!!!!!!!!!!!!!!!!!!!!!!!!!!!!!!!!!!!!!!!!!!!!!!!!!!!!!!!!!!!!!!!!!!!!!!!!!!!!!!!!!!!!!!!!!!!!!!!!!!!!!!!!!!!!!!!!!!!!!!!!!!!!!!!!!!!!!!!!!!!!!!!!!!!!!!!!!!!!!!!!!!!!!!!!!!!!!!!!!!!!!!!!!!!!!!!!!!!!!!!!!!!!!!!!!!!!!!!!!!!!!!!!!!!!!!!!!!!!!!!!!!!!!!!!!!!!!!!!!!!!!!!!!!!!!!!!!!!!!!!!!!!!!!!!!!!!!!!!!!!!!!!!!!!!!!!!!!!!!!!!!!!!!!!!!!!!!!!!!!!!!!!!!!!!!!!!!!!!!!!!!!!!!!!!!!!!!!!!!!!!!!!!!!!!!!!!!!!!!!!!!!!!!!!!!!!!!!!!!!!!!!!!!!!!!!!!!!!!!!!!!!!!!!!!!!!!!!!!!!!!!!!!!!!!!!!!!!!!!!!!!!!!!!!!!!!!!!!!!!!!!!!!!!!!!!!!!!!!!!!!!!!!!!!!!!!!!!!!!!!!!!!!!!!!!!!!!!!!!!!!!!!!!!!!!!!!!!!!!!!!!!!!!!!!!!!!!!!!!!!!!!!!!!!!!!!!!!!!!!!!!!!!!!!!!!!!!!!!!!!!!!!!!!!!!!!!!!!!!!!!!!!!!!!!!!!!!!!!!!!!!!!!!!!!!!!!!!!!!!!!!!!!!!!!!!!!!!!!!!!!!!!!!!!!!!!!!!!!!!!!!!!!!!!!!!!!!!!!!!!!!!!!!!!!!!!!!!!!!!!!!!!!!!!!!!!!!!!!!!!!!!!!!!!!!!!!!!!!!!!!!!!!!!!!!!!!!!!!!!!!!!!!!!!!!!!!!!!!!!!!!!!!!!!!!!!!!!!!!!!!!!!!!!!!!!!!!!!!!!!!!!!!!!!!!!!!!!!!!!!!!!!!!!!!!!!!!!!!!!!!!!!!!!!!!!!!!!!!!!!!!!!!!!!!!!!!!!!!!!!!!!!!!!!!!!!!!!!!!!!!!!!!!!!!!!!!!!!!!!!!!!!!!!!!!!!!!!!!!!!!!!!!!!!!!!!!!!!!!!!!!!!!!!!!!!!!!!!!!!!!!!!!!!!!!
!!!!!!!!!!!!!!!!!!!!!!!!!!!!!!!!!!!!!!!!!!!!!!!!!!!!!!!!!!!!!!!!!!!!!!!!!!!!!!!!!!!!!!!!!!!!!!!!!!!!!!!!!!!!!!!!!!!!!!!!!!!!!!!!!!!!!!!!!!!!!!!!!!!!!!!!!!!!!!!!!!!!!!!!!!!!!!!!!!!!!!!!!!!!!!!!!!!!!!!!!!!!!!!!!!!!!!!!!!!!!!!!!!!!!!!!!!!!!!!!!!!!!!!!!!!!!!!!!!!!!!!!!!!!!!!!!!!!!!!!!!!!!!!!!!!!!!!!!!!!!!!!!!!!!!!!!!!!!!!!!!!!!!!!!!!!!!!!!!!!!!!!!!!!!!!!!!!!!!!!!!!!!!!!!!!!!!!!!!!!!!!!!!!!!!!!!!!!!!!!!!!!!!!!!!!!!!!!!!!!!!!!!!!!!!!!!!!!!!!!!!!!!!!!!!!!!!!!!!!!!!!!!!!!!!!!!!!!!!!!!!!!!!!!!!!!!!!!!!!!!!!!!!!!!!!!!!!!!!!!!!!!!!!!!!!!!!!!!!!!!!!!!!!!!!!!!!!!!!!!!!!!!!!!!!!!!!!!!!!!!!!!!!!!!!!!!!!!!!!!!!!!!!!!!!!!!!!!!!!!!!!!!!!!!!!!!!!!!!!!!!!!!!!!!!!!!!!!!!!!!!!!!!!!!!!!!!!!!!!!!!!!!!!!!!!!!!!!!!!!!!!!!!!!!!!!!!!!!!!!!!!!!!!!!!!!!!!!!!!!!!!!!!!!!!!!!!!!!!!!!!!!!!!!!!!!!!!!!!!!!!!!!!!!!!!!!!!!!!!!!!!!!!!!!!!!!!!!!!!!!!!!!!!!!!!!!!!!!!!!!!!!!!!!!!!!!!!!!!!!!!!!!!!!!!!!!!!!!!!!!!!!!!!!!!!!!!!!!!!!!!!!!!!!!!!!!!!!!!!!!!!!!!!!!!!!!!!!!!!!!!!!!!!!!!!!!!!!!!!!!!!!!!!!!!!!!!!!!!!!!!!!!!!!!!!!!!!!!!!!!!!!!!!!!!!!!!!!!!!!!!!!!!!!!!!!!!!!!!!!!!!!!!!!!!!!!!!!!!!!!!!!!!!!!!!!!!!!!!!!!!!!!!!!!!!!!!!!!!!!!!!!!!!!!!!!!!!!!!!!!!!!!!!!!!!!!!!!!!!!!!!!!!!!!!!!!!!!!!!!!!!!!!!!!!!!!!!!!!!!!!!!!!!!!!!!!!!!!!!!!!!!!!!!!!!!!!!!!!!!!!!!!!!!!!!!!!!!!!!!!!!!!!!!!!!!!!!!!!!!!!!!!!!!
[OK - 12697600 bytes]
Loading c3750-ipbaselmk9-tar.122-55.SE5.tar from 10.1.1.173 (via Vlan20): !!!!!!!!!!!!!!!!!!!!!!!!!!!!!!!!!!!!!!!!!!!!!!!!!!!!!!!!!!!!!!!!!!!!!!!!!!!!!!!!!!!!!!!!!!!!!!!!!!!!!!!!!!!!!!!!!!!!!!!!!!!!!!!!!!!!!!!!!!!!!!!!!!!!!!!!!!!!!!!!!!!!!!!!!!!!!!!!!!!!!!!!!!!!!!!!!!!!!!!!!!!!!!!!!!!!!!!!!!!!!!!!!!!!!!!!!!!!!!!!!!!!!!!!!!!!!!!!!!!!!!!!!!!!!!!!!!!!!!!!!!!!!!!!!!!!!!!!!!!!!!!!!!!!!!!!!!!!!!!!!!!!!!!!!!!!!!!!!!!!!!!!!!!!!!!!!!!!!!!!!!!!!!!!!!!!!!!!!!!!!!!!!!!!!!!!!!!!!!!!!!!!!!!!!!!!!!!!!!!!!!!!!!!!!!!!!!!!!!!!!!!!!!!!!!!!!!!!!!!!!!!!!!!!!!!!!!!!!!!!!!!!!!!!!!!!!!!!!!!!!!!!!!!!!!!!!!!!!!!!!!!!!!!!!!!!!!!!!!!!!!!!!!!!!!!!!!!!!!!!!!!!!!!!!!!!!!!!!!!!!!!!!!!!!!!!!!!!!!!!!!!!!!!!!!!!!!!!!!!!!!!!!!!!!!!!!!!!!!!!!!!!!!!!!!!!!!!!!!!!!!!!!!!!!!!!!!!!!!!!!!!!!!!!!!!!!!!!!!!!!!!!!!!!!!!!!!!!!!!!!!!!!!!!!!!!!!!!!!!!!!!!!!!!!!!!!!!!!!!!!!!!!!!!!!!!!!!!!!!!!!!!!!!!!!!!!!!!!!!!!!!!!!!!!!!!!!!!!!!!!!!!!!!!!!!!!!!!!!!!!!!!!!!!!!!!!!!!!!!!!!!!!!!!!!!!!!!!!!!!!!!!!!!!!!!!!!!!!!!!!!!!!!!!!!!!!!!!!!!!!!!!!!!!!!!!!!!!!!!!!!!!!!!!!!!!!!!!!!!!!!!!!!!!!!!!!!!!!!!!!!!!!!!!!!!!!!!!!!!!!!!!!!!!!!!!!!!!!!!!!!!!!!!!!!!!!!!!!!!!!!!!!!!!!!!!!!!!!!!!!!!!!!!!!!!!!!!!!!!!!!!!!!!!!!!!!!!!!!!!!!!!!!!!!!!!!!!!!!!!!!!!!!!!!!!!!!!!!!!!!!!!!!!!!!!!!!!!!!!!!!!!!!!!!!!!!!!!!!!!!!!!!!!!!!!!!!!!!!!!!!!!!!!!!!!!!!!!!!!!!!!!!!!!!!!!!!!!!!!!!!!!!!!!!!!!!!!!!!!!!!!!!!!!!!!!!!!!!!!!!!!!!!!!!!!!!!!!!!!!!!!!!!!!!!!!!!!!!!!!!!!!!!!!!!!!!!!!!!!!!!!!!!!!!!!!!!!!!!!!!!!!!!!!!!!!!!!!!!!!!!!!!!!!!!!!!!!!!!!!!!!!!!!!!!!!!!!!!!!!!!!!!!!!!!!!!!!!!!!!!!!!!!!!!!!!!!!!!!!!!!!!!!!!!!!!!!!!!!!!!!!!!!!!!!!!!!!!!!!!!!!!!!!!!!!!!!!!!!!!!!!!!!!!!!!!!!!!!!!!!!!!!!!!!!!!!!!!!!!!!!!!!!!!!!!!!!!!!!!!!!!!!!!!!!!!!!!!!!!!!!!!!!!!!!!!!!!!!!!!!!!!!!!!!!!!!!!!!!!!!!!!!!!!!!!!!!!!!!!!!!!!!!!!!!!!!!!!!!!!!!!!!!!!!!!!!!!!!!!!!!!!!!!!!!!!!!!!!!!!!!!!!!!!!!!!!!!!!!!!!!!!!!!!!!!!!!!!!!!!!!!!!!!!!!!!!!!!!!!!!!!!!!!!!!!!!!!!!!!!!!!!!!!!!!!!!!!!!!!!!!!!!!!!!!!!!!!!!!!!!!!!!!!!!!!!!!!!!!!!!!!!!!!!!!!!!!!!!!!!!!!!!!!!!!!!!!!!!!!!!!!!!!!!!!!!!!!!!!!!!!!!!!!!!!!!!!!!!!!!!!!!!!!!!!!!!!!!!!!!!!!!!!!!!!!!!!!!!!!!!!!!!!!!!!!!!!!!!!!!!!!!!!!!!!!!!!!!!!!!!!!!!!!!!!!!!!!!!!!!!!!!!!!!!!!!!!!!!!!!!!!!!!!!!!!!!!!!!!!!!!!!!!!!!!!!!!!!!!!!!!!!!!!!!!!!!!!!!!!!!!!!!!!!!!!!!!!!!!!!!!!!!!!!!!!!!!!!!!!!!!!!!!!!!!!!!!!!!!!!!!!!!!!!!!!!!!!!!!!!!!!!!!!!!!!!!!!!!!!!!!!!!!!!!!!!!!!!!!!!!!!!!!!!!!!!!!!!!!!!!!!!!!!!!!!!!!!!!!!!!!!!!!!!!!!!!!!!!!!!!!!!!!!!!!!!!!!!!!!!!!!!!!!!!!!!!!!!!!!!!!!!!!!!!!!!!!!!!!!!!!!!!!!!!!!!!!!!!!!!!!!!!!!!!!!!!!!!!!!!!!!!!!!!!!!!!!!!!!!!!!!!!!!!!!!!!!!!!!!!!!!!!!!!!!!!!!!!!!!!!!!!!!!!!!!!!!!!!!!!
examining image...
extracting info (106 bytes)
extracting c3750-ipbasek9-mz.122-55.SE5/info (681 bytes)
extracting info (106 bytes)
Stacking Version Number: 1.45
System Type: 0x00000000
Ios Image File Size: 0x00B8B200
Total Image File Size: 0x00C19A00 Minimum Dram required: 0x08000000
Image Suffix: ipbasek9-122-55.SE5
Image Directory: c3750-ipbasek9-mz.122-55.SE5
Image Name: c3750-ipbasek9-mz.122-55.SE5.bin
Image Feature: IP|LAYER_3|SSH|3DES|MIN_DRAM_MEG=128
Old image for switch 1: flash:c3750-ipbasek9-mz.122-35.SE2
Old image will be deleted before download.
Deleting `flash:c3750-ipbasek9-mz.122-35.SE2' to create required space
Extracting images from archive into flash...
Once the overwrite is done, confirm that the Cisco Switch is booting from the new image.
Switch#dir flash:
Directory of flash:/
2 -rwx 3001 Jul 25 1993 05:53:33 +00:00 private-config.text
4 -rwx 1644 Jun 28 1993 14:11:01 +00:00 vlan.dat
510 drwx 192 Aug 8 1993 09:32:45 +00:00 c3750-ipbasek9-mz.122-55.SE5
458 -rwx 10170 Jul 25 1993 05:53:33 +00:00 config.text
15998976 bytes total (3331072 bytes free)
Switch#
The next step is to boot the image, save the configuration and reboot the system.
Switch#show boot
BOOT path-list : flash:c3750-ipbasek9-mz.122-55.SE5/c3750-ipbasek9-mz.122-55.SE5.bin
Config file : flash:/config.text
Private Config file : flash:/private-config.text
Enable Break : no
Manual Boot : no
HELPER path-list :
Auto upgrade : yes
Auto upgrade path :
Switch#
Switch#wr
Building configuration...
[OK]
Switch#reload
Proceed with reload? [confirm]
Thursday, April 12, 2012
ASA 5505 Licensed Host Limit Reached
ASA 5505 basic license comes with only 10 internal host connection. If you have more than 10 devices that need access to the internet, the 11th device will not get a NATed.
For short term solution, you can reload the ASA configuration.
But to permanently fix this issue, you have to get a different license key from Cisco. For example upgrade from basic 10 users to 50 users license.
To check the status of the license limit, use this command:
show local-host
For short term solution, you can reload the ASA configuration.
But to permanently fix this issue, you have to get a different license key from Cisco. For example upgrade from basic 10 users to 50 users license.
To check the status of the license limit, use this command:
show local-host
Monday, March 19, 2012
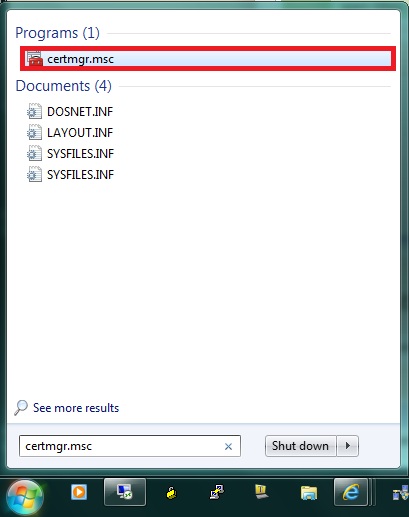
Windows 7 Certificate Manager
MS Windows 7 Certificate Manager.
To view certificate manager on Windows 7, please run certmgr.msc on start menu.

This will open a Certificate Manager window like the following:

To view certificate manager on Windows 7, please run certmgr.msc on start menu.
This will open a Certificate Manager window like the following:

Tuesday, March 13, 2012
ASA 5510 ASDM enable feature to view traffic
This is the steps to enable Top 10 Sources / Top 10 Destinations on ASA 5505 using GUI interface.


Configuration > Firewall > Threat Detection > Scanning Threat Statistics
Host = Top 10 Sources / Destination
Access Rules = Top 10 Access Rules
Port / Protocol = Top 10 Services
Saturday, February 4, 2012
BPDU Guard on Switch STP
SW1 has 48 ports with 4 10 Gig ports on Port tengig 49,50,51,52
switch> enable
switch# configure terminal
switch(config)# hostname SW1
SW1(config)# interface tengig 0/49
SW1(config-if)# switchport mode trunk
SW1(config-if)# switchport encapsulation dot1q
SW1(config-if)# switcport trunk native vlan 99
SW1(config-if)# description Trunk port to SW2
SW1(config-if)# no shutdown
SW1(config-if)# exit
SW1(config)#
SW1(config)#
SW1(config)# int range gigten 0/50-52
SW1(config-if)# shutdown
SW1(config-if)# exit
SW1(config)#
SW1(config)# spanning-tree portfast default
SW1(config)# int range gig 0/1-48
SW1(config-if)# spanning-tree portfast bpduguard default
SW1(config-if)# exit
SW1(config)#
SW1(config)#
Wednesday, January 4, 2012
VLAN Access List Configuration
VLAN Access List Configuration:
We can use VLan Access List to filter traffic that is flowing within a VLAN.
switch(config)# vlan access-map map-name [sequence-number]
Follows with a matching condition with one of the following access map configuration commands:
switch(config-access-map)# match ip address {acl-number | acl-name}
switch(config-access-map)# match ipx address {acl-number | acl-name}
switch(config-access-map)# match mac address acl-name
Define the action with the following access map configuration command:
switch(config-access-map)# action {drop | forward [capture] | redirect type mod/num}
Monday, January 2, 2012
Basic IPsec VPN
Why use IPSEc VPN
VPN will allow connectivity between two LAN networks (LAN-1 and LAN-2). With Site-to-Site IPSEc VPN between the 2 devices, we can establish a secure tunnel over the internet and pass our private LAN traffice inside this tunnel.
How IPSEc WorksThere are five main steps followed by the IPSEc devices:
- Interesting Traffic: the IPSEc devices recognize the traffice to protect
- Phase 1 (ISAKMP): The IPSEc devices negotiate an IKE security policy and establish a secure channel for communication.
- Phase 2 (IPSEc): The IPSEc devices negotiate an IPSEc security policy to protect data.
- Data Transfer: Data is transferred securely between the IPSEc peers based on the IPSEc parameters and keys negotiated during the previous phases.
- IPSEc Tunnel Terminated: IPSEc SAs terinate when timing out or a certain data volume is reached.

Let's work on the ASA on the left side first.
First is to configure the interfaces on the ASA.
ciscoasa(config)# interface vlan 1
ciscoasa(config-if)# nameif outside
ciscoasa(config-if)# security-level 0
ciscoasa(config-if)# ip address 100.100.100.1 255.255.255.0
ciscoasa(config-if)# exit
ciscoasa(config)#
ciscoasa(config)# interface vlan 2
ciscoasa(config-if)# nameif inside
ciscoasa(config-if)# security-level 100
ciscoasa(config-if)# ip address 192.168.1.1 255.255.255.0
ciscoasa(config-if)# exit
ciscoasa(config)#
ciscoasa(config)# interface ethernet 0/0
ciscoasa(config-if)# switchport access vlan 1
ciscoasa(config-if)# exit
ciscoasa(config)# interface ethernet 0/1
ciscoasa(config-if)# switchport access vlan 2
Configure Phase 1 (ISAKMP)
Phase 1 of the IPSEc operation is used to establish a secure communication channel for futher data transmission. In Phase 1, VPN peers exchange shared secret keys, authenticate each other and negotiate IKE secuirty policies etc.
ciscoasa(config)# isakmp policy "priority number"
ciscoasa(config-isakmp-policy)# encryption (aes|3des|des)
ciscoasa(config-isakmp-policy)# hash (sha|md5)
ciscoasa(config-isakmp-policy)# authentication (pre-share|rsa-sig)
ciscoasa(config-isakmp-policy)# group (1|2|5|7)
ciscoasa(config-isakmp-policy)# lifetime "seconds"
ciscoasa(config-isakmp-policy)# exit
ciscoasa(config)# isakmp enable "interface-name"
ciscoasa(config)# isakmp identity address << = identity the ASA with its address and not FQDN
//Specify the pre-shared key and the type of the VPN using the tunnel-group command
ciscoasa(config)# tunnel-group "peer IP address" type(ipsec-l2l|ipsec-ra|webvpn)
ciscoasa(config)# tunnel-group "peer IP address" ipsec-attributes
ciscoasa(config-tunnel-ipsec)# pre-shared-key "key"
The following is the example of the configuration:
ciscoasa(config)# isakmp policy 10
ciscoasa(config-isakmp-policy)# encryption aes
ciscoasa(config-isakmp-policy)# hash sha
ciscoasa(config-isakmp-policy)# authentication pre-share
ciscoasa(config-isakmp-policy)# group 2
ciscoasa(config-isakmp-policy)# lifetime 3600
ciscoasa(config-isakmp-policy)# exit
ciscoasa(config)# isakmp enable outside
ciscoasa(config)# isakmp identity address
ciscoasa(config)# tunnel-group RIGHT_SIDE_ASA type ipsec-l2l
ciscoasa(config)# tunnel-group RIGHT_SIDE_ASA ipsec-attributes
ciscoasa(config-tunnel-ipsec)# pre-shared-key SUPERSTRONGVPNPASSWORD
Configure Phase 2 (IPSEc)Configure the Transform-set and Crypto Map
Negotiation of IPSEc security parameters and IPSEc transform sets
Establishment of IPSEc SAs
Renegotiation of IPSEc SAs periodically to enscure security
Transform set format on CLI:
ciscoasa(config)# crypto ipsec transform-set "name" "transform1" "transform2"
After configuring the Transform set on both IPSEc peers, we need to configure a crypto map which contains all Phase 2 IPSEc parameters. This crypto map is then attached to the firewall interface (usually "outside") on which the IPSEc will be established.
ciscoasa(config)# crypto map "name" "seq-num" match address "Crypto-ACL"
ciscoasa(config)# crypto map "name" "seq-num" set peer "Peer_IP_address"
ciscoasa(config)# crypto map "name" "seq-num" set transform-set "Transfor_set_name"
ciscoasa(config)# crypto map "name" "seq-num" set security-association lifetime seconds {seconds}
ciscoasa(config)# crypto map "name" interface "interface-name"
The following is the example of the configuration:
ciscoasa(config)# crypto ipsec transform-set LEFTASASIDE esp-aes-192 esp-sha-hmac
ciscoasa(config)# crypto map LEFTASAVPN 20 match address LAN1-TO-LAN2
ciscoasa(config)# crypto map LEFTASAVPN 20 set peer 200.200.200.1
ciscoasa(config)# crypto map LEFTASAVPN 20 set transform-set LEFTASASIDE
ciscoasa(config)# crypto map LEFTASAVPN 20 set security-association lifetime seconds 36000
ciscoasa(config)# crypto map LEFTASAVPN interface outside
VPN will allow connectivity between two LAN networks (LAN-1 and LAN-2). With Site-to-Site IPSEc VPN between the 2 devices, we can establish a secure tunnel over the internet and pass our private LAN traffice inside this tunnel.
How IPSEc WorksThere are five main steps followed by the IPSEc devices:
- Interesting Traffic: the IPSEc devices recognize the traffice to protect
- Phase 1 (ISAKMP): The IPSEc devices negotiate an IKE security policy and establish a secure channel for communication.
- Phase 2 (IPSEc): The IPSEc devices negotiate an IPSEc security policy to protect data.
- Data Transfer: Data is transferred securely between the IPSEc peers based on the IPSEc parameters and keys negotiated during the previous phases.
- IPSEc Tunnel Terminated: IPSEc SAs terinate when timing out or a certain data volume is reached.

Let's work on the ASA on the left side first.
First is to configure the interfaces on the ASA.
ciscoasa(config)# interface vlan 1
ciscoasa(config-if)# nameif outside
ciscoasa(config-if)# security-level 0
ciscoasa(config-if)# ip address 100.100.100.1 255.255.255.0
ciscoasa(config-if)# exit
ciscoasa(config)#
ciscoasa(config)# interface vlan 2
ciscoasa(config-if)# nameif inside
ciscoasa(config-if)# security-level 100
ciscoasa(config-if)# ip address 192.168.1.1 255.255.255.0
ciscoasa(config-if)# exit
ciscoasa(config)#
ciscoasa(config)# interface ethernet 0/0
ciscoasa(config-if)# switchport access vlan 1
ciscoasa(config-if)# exit
ciscoasa(config)# interface ethernet 0/1
ciscoasa(config-if)# switchport access vlan 2
Configure the interesting traffic.
ciscoasa(config)# access-list LAN1-TO-LAN2 extended permit ip 192.168.1.0 255.255.255.0 192.168.2.0 255.255.255.0
//Traffic that will be encrypted using CRYPTO ACL
ciscoasa(config)# access-list NONAT extended permit ip 192.168.1.0 255.255.255.0 192.168.2.0 255.255.255.0
ciscoasa(config)# nat (inside) 0 access-list NONAT
//Because IPSEc does not work with NAT, we need to exclude the interesting traffic from the NAT operation.
//This means the interesting traffic in the crypto ACL must not be translated using the NAT 0 command
Configure Phase 1 (ISAKMP)
Phase 1 of the IPSEc operation is used to establish a secure communication channel for futher data transmission. In Phase 1, VPN peers exchange shared secret keys, authenticate each other and negotiate IKE secuirty policies etc.
ciscoasa(config)# isakmp policy "priority number"
ciscoasa(config-isakmp-policy)# encryption (aes|3des|des)
ciscoasa(config-isakmp-policy)# hash (sha|md5)
ciscoasa(config-isakmp-policy)# authentication (pre-share|rsa-sig)
ciscoasa(config-isakmp-policy)# group (1|2|5|7)
ciscoasa(config-isakmp-policy)# lifetime "seconds"
ciscoasa(config-isakmp-policy)# exit
ciscoasa(config)# isakmp enable "interface-name"
ciscoasa(config)# isakmp identity address << = identity the ASA with its address and not FQDN
//Specify the pre-shared key and the type of the VPN using the tunnel-group command
ciscoasa(config)# tunnel-group "peer IP address" type(ipsec-l2l|ipsec-ra|webvpn)
ciscoasa(config)# tunnel-group "peer IP address" ipsec-attributes
ciscoasa(config-tunnel-ipsec)# pre-shared-key "key"
The following is the example of the configuration:
ciscoasa(config)# isakmp policy 10
ciscoasa(config-isakmp-policy)# encryption aes
ciscoasa(config-isakmp-policy)# hash sha
ciscoasa(config-isakmp-policy)# authentication pre-share
ciscoasa(config-isakmp-policy)# group 2
ciscoasa(config-isakmp-policy)# lifetime 3600
ciscoasa(config-isakmp-policy)# exit
ciscoasa(config)# isakmp enable outside
ciscoasa(config)# isakmp identity address
ciscoasa(config)# tunnel-group RIGHT_SIDE_ASA type ipsec-l2l
ciscoasa(config)# tunnel-group RIGHT_SIDE_ASA ipsec-attributes
ciscoasa(config-tunnel-ipsec)# pre-shared-key SUPERSTRONGVPNPASSWORD
Configure Phase 2 (IPSEc)Configure the Transform-set and Crypto Map
Negotiation of IPSEc security parameters and IPSEc transform sets
Establishment of IPSEc SAs
Renegotiation of IPSEc SAs periodically to enscure security
Transform set format on CLI:
ciscoasa(config)# crypto ipsec transform-set "name" "transform1" "transform2"
After configuring the Transform set on both IPSEc peers, we need to configure a crypto map which contains all Phase 2 IPSEc parameters. This crypto map is then attached to the firewall interface (usually "outside") on which the IPSEc will be established.
ciscoasa(config)# crypto map "name" "seq-num" match address "Crypto-ACL"
ciscoasa(config)# crypto map "name" "seq-num" set peer "Peer_IP_address"
ciscoasa(config)# crypto map "name" "seq-num" set transform-set "Transfor_set_name"
ciscoasa(config)# crypto map "name" "seq-num" set security-association lifetime seconds {seconds}
ciscoasa(config)# crypto map "name" interface "interface-name"
The following is the example of the configuration:
ciscoasa(config)# crypto ipsec transform-set LEFTASASIDE esp-aes-192 esp-sha-hmac
ciscoasa(config)# crypto map LEFTASAVPN 20 match address LAN1-TO-LAN2
ciscoasa(config)# crypto map LEFTASAVPN 20 set peer 200.200.200.1
ciscoasa(config)# crypto map LEFTASAVPN 20 set transform-set LEFTASASIDE
ciscoasa(config)# crypto map LEFTASAVPN 20 set security-association lifetime seconds 36000
ciscoasa(config)# crypto map LEFTASAVPN interface outside
Subscribe to:
Comments (Atom)